In this article (4 sections)
Turn Toilet Paper Rolls Into Cozy Yarn Pumpkins
A little leftover yarn and an empty toilet paper roll can become a charming autumn decoration. These miniature pumpkins are soft, colorful, and inexpensive to make—just right for a rainy afternoon with the kids or a relaxed fall craft party.
The cardboard provides the structure, while layers of yarn create the pumpkin’s rounded shape. Finish each one with a small twig or cinnamon stick, and you have a handmade accent for a shelf, table, or seasonal display.
What You’ll Need
- Empty cardboard toilet paper rolls
- Orange yarn, or other colors you like
- Scissors
- Craft glue
- Short twigs or pieces of cinnamon stick
- Optional: green felt, ribbon, or yarn for leaves and vines
Thicker yarn covers the cardboard more quickly, making it a helpful choice for younger crafters. An adult should handle cutting the cardboard and trimming any stems.
How to Make Yarn Pumpkins
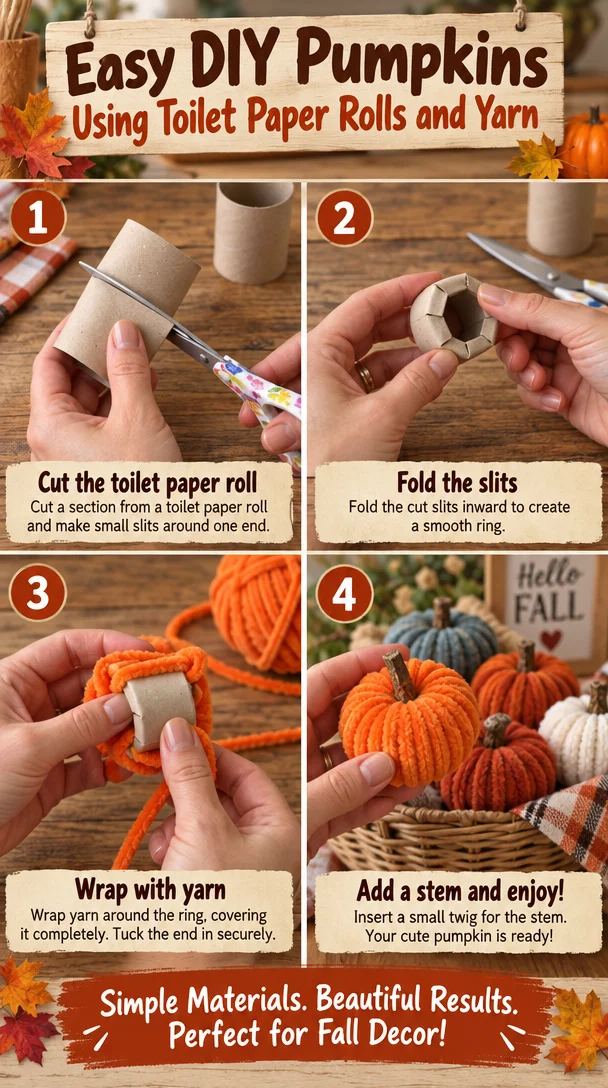
1. Cut the Cardboard Rings
Cut a toilet paper roll crosswise into rings about ¾ to 1 inch wide. Each ring will become one small pumpkin.
Set a ring flat on the table, with its opening facing upward. This opening is where you’ll thread the yarn—and eventually place the stem.
2. Wrap the Yarn
Cut a manageable length of yarn and secure one end to the inside of the ring with a dab of craft glue. Let it set.
Pass the yarn through the center opening, over the cardboard edge, and around the outside. Repeat, moving around the ring until the cardboard is covered.
Add more layers to build a plump, rounded shape. When a strand runs out, tuck its end beneath the wrapping and secure it with glue, then start another length.
3. Shape Your Pumpkin
Gently spread and adjust the yarn so the coverage looks even. Keep building up thin spots until the ring resembles a squat little pumpkin, leaving a small opening in the middle for the stem.
Tuck the final yarn end beneath nearby strands and glue it in place.
4. Add the Finishing Touches
Glue a short twig or cinnamon stick into the center opening. If the opening is too large, tuck in a little extra yarn to help support the stem.
For a playful finish, add a green felt leaf or a curling strand of green yarn beside it. Allow the glue to dry before moving your pumpkin.
Make a Whole Pumpkin Patch
Try classic orange, creamy white, mustard yellow, or soft sage yarn. Mixing colors and slightly different ring widths gives your collection a cheerful, handmade look.
Arrange the finished pumpkins on a tray, line them along a bookshelf, or use them as table decorations. Keep them away from candles and other heat sources.
This simple project turns everyday leftovers into something worth displaying—and gives everyone a chance to make their own little piece of fall.